How React Native Works and How To Use It
Last Updated: November 1st 2022
What is React Native? An Introduction
React Native greatly simplifies the process of creating mobile applications for iPhone and Android, and the workflow and technology is familiar to most web-developers. I recently gave a talk for the Spokane Frontend Web Development Meetup about React Native and the Expo Toolchain, and this post share the highlights of that talk.
This is by no means an exhaustive list of features in Expo and React Native. However, it show how familiar JavaScript code is used to create a cross-platform mobile application. I’ll introduce a few different built-in components such as View, Button, Modal and FlatList, I’ll also describe how to style components, and update state, among other things.
How does React Native work?
React Native is a JavaScript framework that lets you construct your own apps using a React-like component structure and then compile them to native Android or iOS code. By using the Expo toolchain you can build apps quickly and easily, and even take advantage of low-level hardware features such as cameras, notifications and much more.
A React Native Example Project
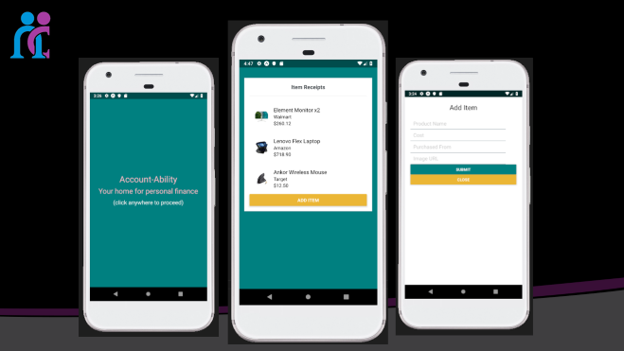
In this presentation we created a simple app that could be used to track expenses:

The first screen is a splash screen. The second page shows the list of expense items, and gives you a button that allows the user to open a modal. In the modal shown on the third screen, you can input details like “title”, “cost”, and “purchased from”. When the submit button is pressed, the new item is added to the application state, and the list of items on the second page is updated. We’ll dig into the specifics soon, but first let’s go over the reference material.
Resources: React Native Code on GitHub
All of the resources for the demonstration are available at the following GitHub link:
Find the React Native Code on GitHub
I built the project in a few different stages. The first few stages just include the splash screen and a stub for the second screen. The folder “stage_5” contains all of the code and the PowerPoint describes the process at a high-level.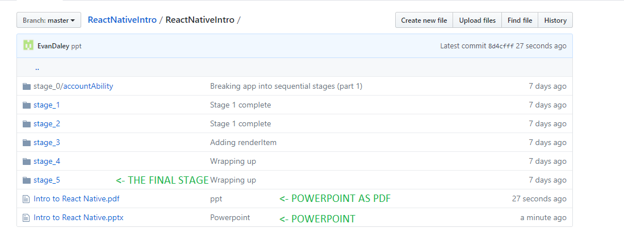
React Native Project Functionality
Let break this down. The first screen in the app is just a simple functional component with some basic styling. If you’re comfortable with React this should look pretty standard. To add styling to the component we are essentially just using CSS. The main difference is that we are passing it in as an object and the keys are camelCase as opposed to being delimiter-separated (i.e. backgroundColor vs background-color).
React Native Code: Splash Screen
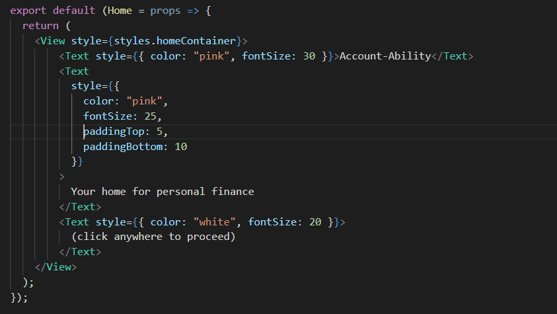
We just created a component that can be compiled to Java for Android or Objective C for iOS.
The next step is to create the a page that can store all of our items. For that I created a class component that contains a Card, Flatlist and Button. Each of these elements are built into React Native, and can be modified using the same CSS-like syntax.
Within the render function of the Items component you can see how Card, Flatlist, and Button are used to create the body of the second screen: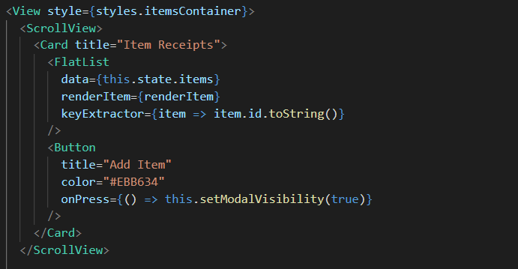
I want a modal to show up when the button is pressed, so I added a variable to the component state called modalVisible. When setModalVisibility is called, it can update the state of the component to either show or hide the modal. The modal renders conditionally, based on the state (this.state.modalVisible). This means that toggling that value to true or false will automatically make the modal appear or disappear.
Finally, we add the input elements to the body of the modal so that the user can put in specific details related to the product they are adding. Once again, React Native does all the heavy lifting and all we have to do is define an “Input” component that is capable of updating the component state.
Submitting the form is also very straightforward. React Native gives us a Button component, that exposes an onPress event that we can use for both toggling the modal and submitting the form.
When submitForm is called we push the new item into the application state. Updating the component state automatically triggers an update to the view and the new item instantly appears in the list.
Another nice trick that you can use with React Native is the ScrollView. This is a simple component that can be used to wrap any other component that renders larger than the actual width or height of the phone. In this screenshot the list has expanded beyond the height of the phone but by dropping everything into a ScrollView the user has the ability to scroll up and down to see the whole list.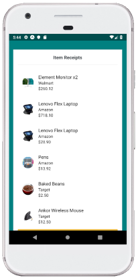
React Native Conclusion
Ultimately, React Native allows us to create native apps quickly and easily using a workflow that is familiar to most web developers. By sticking with JavaScript and CSS, we overcome the learning barrier associated with traditional app development and lower the cost of education.
If you would like to learn more about React Native, or learn how Nucamp is revolutionizing the educational landscape checkout out our website:
Chevas Balloun
Director of Marketing & Brand
Chevas has spent over 15 years inventing brands, designing interfaces, and driving engagement for companies like Microsoft. He is a practiced writer, a productivity app inventor, board game designer, and has a builder-mentality drives entrepreneurship.


